

Preparing homemade black pasta with squid ink is an exquisite endeavor. Fresh egg pasta, following an Italian recipe, is the epitome of what you can make at home using simple eggs and flour. The black pasta, with its mild, subtly expressed marine flavor, is unlike any seafood or fish we're accustomed to. The inky-black "Pasta al nero di seppia" reveals its flavor upon cooking. It pairs perfectly with seafood, such as spaghetti with shrimp, salmon, squid, or cuttlefish.
Squid ink is not just a delicacy but also a superfood. It is rich in vitamins, amino acids, and trace elements and is known for lowering blood cholesterol levels, among other benefits. For me, it's primarily a unique and incomparable ingredient in taste.
Making Homemade Pasta is Easy
From my experience, making egg dough for pasta at home is straightforward. It requires about an hour, a minimal set of ingredients, and a bit of effort. A pasta machine is a fantastic aid in this adventure. For those choosing to roll out and cut the noodles manually, a broad working surface (ideally wooden and rough), a long rolling pin, a sharp knife, and patience are necessary. This recipe allows for black pasta preparation, any other natural dye, or even plain noodles without any additives, following one of the fundamental Italian recipes for fresh egg pasta "pasta fresca".
In Italian cuisine, the ratio is 1 egg per 3.5 oz (100 g) of flour = one serving. Italian cuisine is all about generous portions, and I usually divide them by two.
Ingredients for 2 portions

- 3/4 cup durum wheat Semolina flour (100 g)
- 3/4 cup Wheat flour Type 00, or unbleached all-purpose flour (100 g)
- 2 whole Eggs
- 1 pinch Salt
- 1 tbsp Squid ink (15 g)
Squid Ink Fresh Pasta Dough Recipe
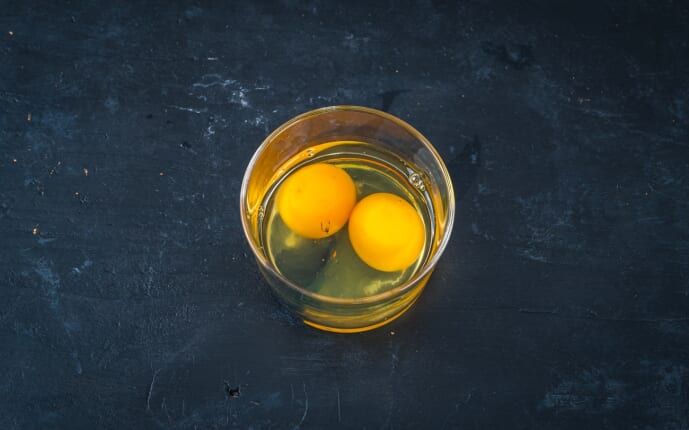
In a separate bowl, combine 2 room-temperature eggs, a pinch of salt, and 1 tablespoon (10-15 grams) of squid ink.
The more ink in the dough, the richer its color, aroma, and taste will be. This simple recipe works with fresh squid ink from an undivided squid carcass or canned from the store.
Though classic Italian egg dough recipes don't include salt, my experience shows it enhances the dish's flavor.

Mix the eggs, salt, and squid ink until homogeneous.
Traditional fresh egg pasta is made from eggs and flour. Add olive oil – 1 tsp per 2 eggs for a softer and more elastic dough consistency. I recommend rolling and cutting the dough by hand, as the oil makes it more manageable.
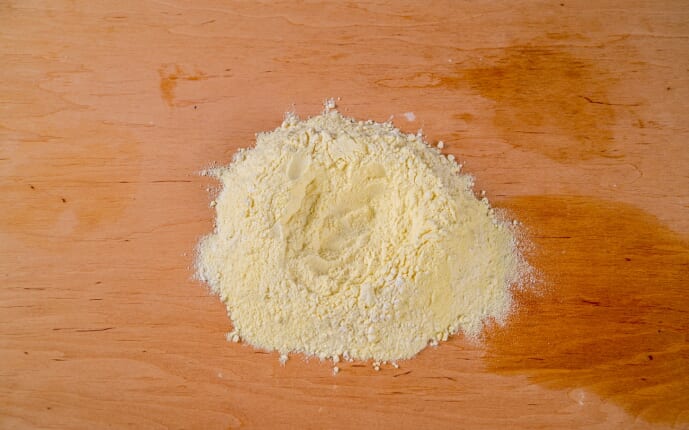
Mix 3/4 cup (100 grams) durum wheat semolina flour and 3/4 cup (100 grams) '00' flour (or unbleached all-purpose flour), then sift them through a sieve. It's best to set aside about 1/4 cup (20-30 grams) of flour right away in case the dough takes in less flour than expected.
1 heaping tablespoon of flour equals about 1/4 cup (20 grams) of flour.
Heap the flour on the work surface. Make a well in the center, forming a crater like a volcano.
There are several options for making egg pasta. For a softer consistency and taste, use only Italian-style type 00 or 0 wheat flour (Grano Tenero — from soft wheat). For pasta with a richer taste and porous texture, add double-milled semolina flour (Grano Duro — from durum wheat varieties). The amount of semolina in the dough can vary from 20% to 50%. The optimal range is considered to be 20-30%, but in my opinion, pasta with 50% semolina content turns out very delicious.
If you can't find the flour described in the recipe, you can replace it with regular high-grade or extra-class wheat flour. However, the taste and texture of the finished products may vary. Therefore, I recommend finding wheat flour from hard varieties for sale and using it in a proportion of 20-50% to regular flour.
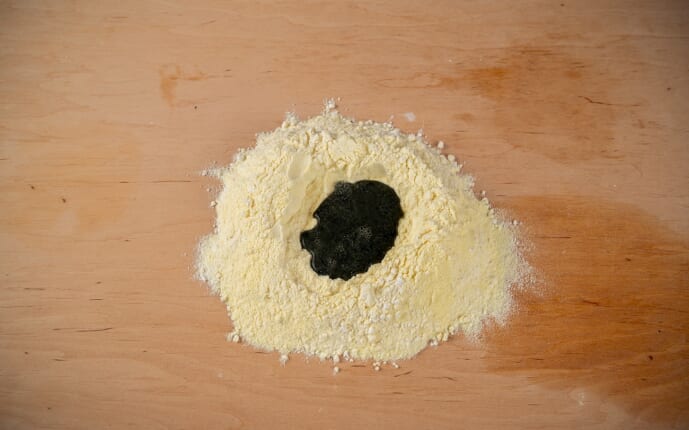
Pour the beaten eggs into the center of the flour mound. Using a fork or your fingers, start kneading from the center, gradually incorporating the flour from the edges into the egg mixture. If you're a beginner, you can mix the dough in a bowl at this stage.
In traditional Italian recipes, for every large egg (category CВ or СО), use 3/4 cup (100 grams) of flour. If you're using medium or smaller eggs from categories C1, C2, or C3, keep in mind that you might need less flour.
The final dough's consistency is also affected by the flour's quality, moisture content, and the amount of gluten. From my experience, our flour, unlike the Italian one, absorbs less liquid, so you might end up using slightly more than the recipe calls for.

As soon as the flour and eggs are combined, knead the dough by hand. Try to gather the dough into a ball, then stretch it out, pressing with the palm against the table. Since the dough is stiff, it's easier to do this while holding one edge with the other hand.
Then, twist it back into a ball, turn it 90 degrees, and repeat the process. This method enriches the dough with oxygen. Thanks to vigorous kneading, gluten molecules start to work, and gluten becomes activated.
The dough can be kneaded by hand or with a mixer. Hand-kneading takes about 10-15 minutes, while using a mixer reduces the time to approximately 5 minutes.
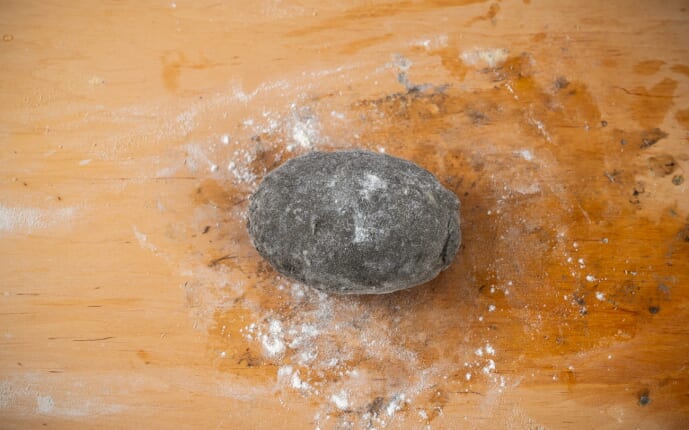
The finished dough turns out uniform, elastic, and smooth, yet sufficiently firm. At this kneading stage, we can add the remaining flour (20-30g) we set aside at the beginning, provided the dough isn't too tough and easily absorbs the flour.
The surest sign that the kneading can be stopped is the appearance of tiny air bubbles in the dough. This indicates that the gluten has started to work, and the dough retains air and stretches excellently.
If the dough is very hard, difficult to work with, and cracks when trying to knead it or shape it into a ball, it means there's too much flour. To fix this, in a separate container, beat an egg. Add a small portion of the beaten egg (1 tsp or 1 tbsp, depending on the situation) to the dough, knead it, and check the consistency. If necessary, add another spoonful of the egg mixture and repeat the process until you get an elastic, uniform, firm dough that can be shaped into a ball without cracking. If desired, the beaten egg can be substituted with plain water.
Conversely, if the dough is too soft, fails to hold its shape, or is sticky, it means there's not enough flour. In this case, gradually add flour to it until the desired consistency is achieved.
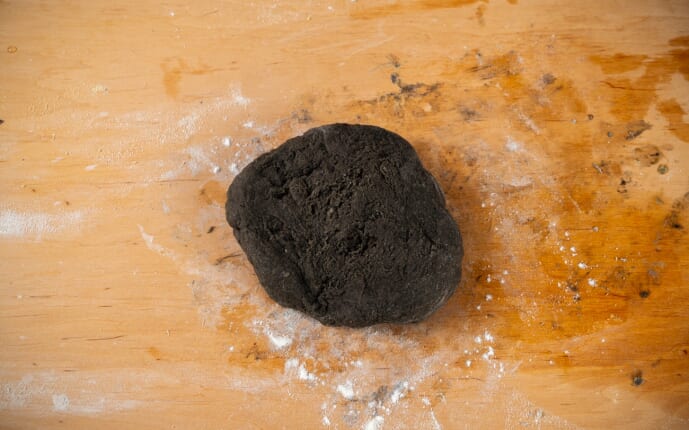
Shape the finished dough into a ball, a disk, or a log.
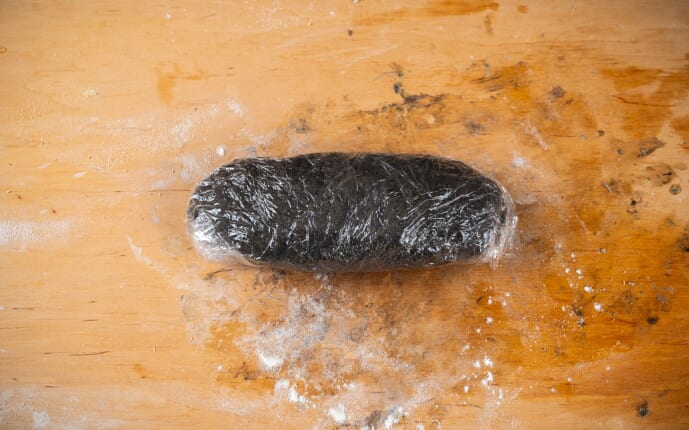
Wrap the finished dough in plastic wrap and leave it to rest for 20-30 minutes at room temperature. If the room is cold, this time can be extended up to 60 minutes.
After resting, the dough will become softer, more pliable, and elastic.

Divide the dough into 3-4 parts. Start working with one part, and tightly wrap the others in plastic wrap to prevent them from drying out.
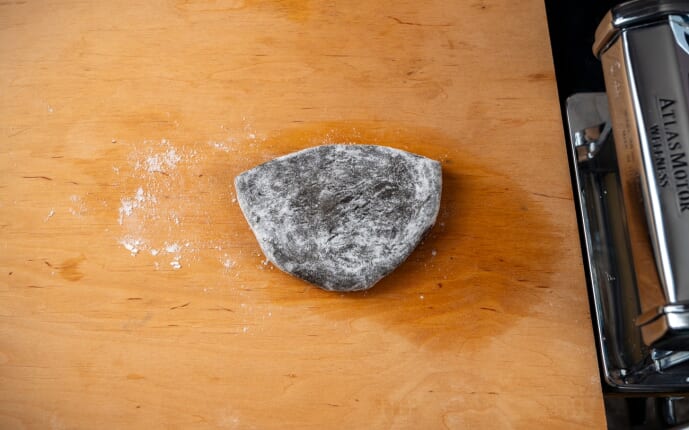
Lightly press down on the piece of dough with your hand, making it flatter. The thickness of the dough should be about 1/5 inch (5mm). If at this stage it starts sticking to your hands or the work surface, dust it generously with flour. The dough should not crack.
I roll out the dough using a pasta machine, but this process can also be replicated using a rolling pin.
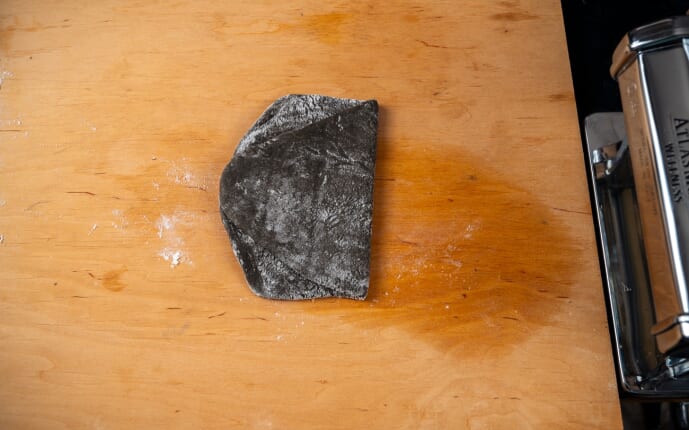
I select the starting setting on the pasta machine and pass the dough sheet through it. Then, I fold in the uneven edges, aiming for a more rectangular shape, and pass the sheet through the machine again. I repeat this process an additional 3-4 times before reducing the machine settings by one notch.
Remember to lightly dust the dough with flour at each rolling stage, but avoid doing so excessively.
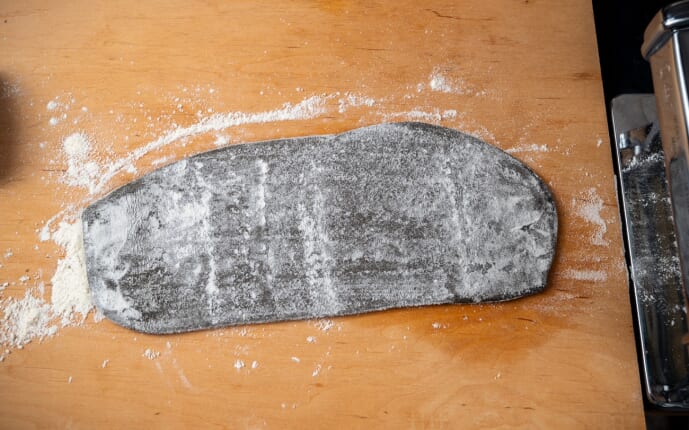
On the adjusted settings, I pass the dough through 3-4 more times. At this point, it's also possible to fold the dough's edges to achieve a more uniform shape. However, the thinner the dough is rolled out, the less I recommend doing this.
Visually, the difference might not be noticeable, but if we reduce the settings on the pasta machine too quickly, the dough might not be uniform, and it could get caught or "chewed" by the machine. That's why on each setting, we pass the dough through at least three times, remembering to lightly dust it with flour at each stage.
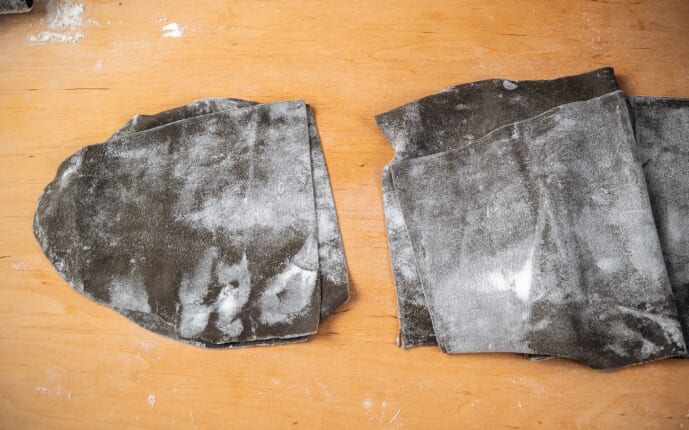
I roll the dough to a thickness of 1/32 inch (0.8mm), which corresponds to the #6 setting on my pasta machine. The recommended thickness for homemade egg pasta is about 1/50 inch (0.5mm).
If you end up with an overly large sheet of dough, it's better to cut it into portions of the desired length; otherwise, your pasta will be very long. If necessary, you can trim the uneven edges.
If holes form in the dough while rolling it out, there could be several reasons:
- The dough is too soft, lacking sufficient flour, causing it to stick to the pasta machine's press.
- The dough is too dry, leading to it crumbling or cracking.
- The dough was rolled out incorrectly, for example, you may have quickly moved from one setting to another on the regulator, resulting in the pasta machine tearing or "chewing" up the too-thick dough.
If you're rolling out the dough by hand, it should be of uniform thickness and almost transparent.
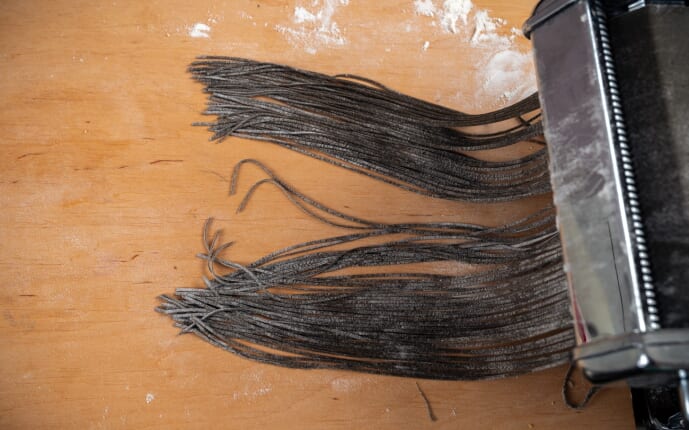
Change the attachment on the pasta machine and cut the noodles into the desired size. For me, that's the thinnest tagliolini at 1/16 to 1/12 inch (1-2mm) wide. Dust the cut pasta strips with flour to prevent them from sticking together.
From such dough, you can cut sheets for lasagna, make ravioli, noodles, or tagliatelle with a width of 5-8mm.
If you are cutting the pasta by hand, it's best to cover the rolled-out sheet with a clean towel and leave it for 15-20 minutes to dry out a bit. This way, the dough will stick together less when cutting. Then, dust the sheet with flour, roll it up loosely, and cut it with a sharp knife into equal strips of the desired size.
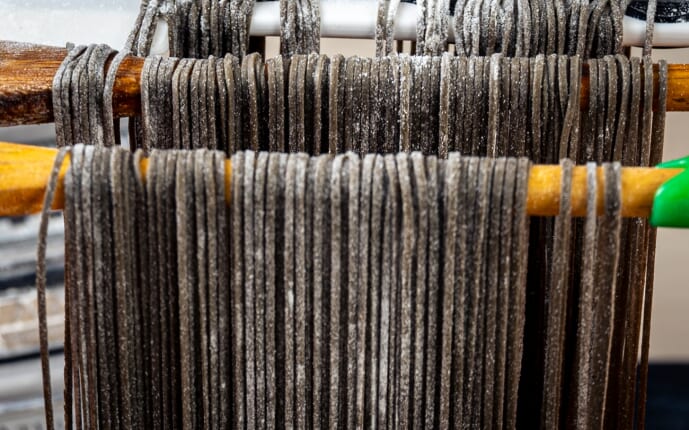
Dust the finished noodles with flour and hang them on a special pasta drying rack. If you don't have one, you can adapt kitchen spatulas or any suitable sticks. It's important to remember that pasta gradually dries and becomes brittle, so handle it carefully.
Another method is to dust the pasta with flour, shake off the excess, and then form it into small, portion-sized nests.
Before cooking, the ready pasta can be covered with a clean towel and stored in a cool place for 30 minutes to 3 hours.
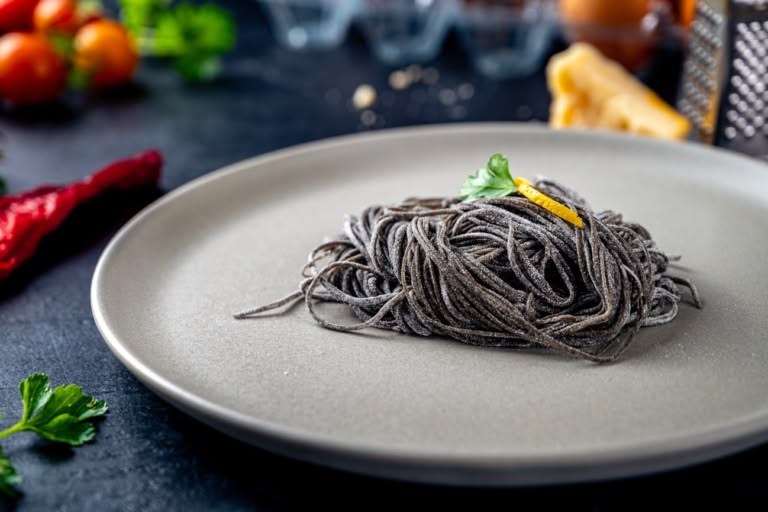
Fresh homemade black pasta cooks quickly - about 2-3 minutes depending on thickness. Fresh Italian pasta is done when it floats to the surface and is surrounded by foam.
Recipe Tips
Storage
If you're not planning to cook the homemade noodles immediately, there are three ways to store them for later use:
Fresh Pasta in Refrigerator
Storage time: 2-3 days
For best results, slightly dry pasta before refrigerating to prevent sticking. Spread portions on a baking sheet, keeping some distance between them, and cover with a clean towel. Let dry for 30-40 minutes, then transfer to an airtight container or ziplock bag. Store in refrigerator. Important: Avoid putting too much pasta in one container to prevent sticking.
Dried Pasta
Storage time: 1 month
Spread pasta in a single layer on a baking sheet, either as portion-sized nests or spaghetti-style strips. Place in oven preheated to 122°F (50°C), then turn off heat. If pasta remains moist after oven cools, repeat the process. To prevent excess moisture, keep oven door slightly ajar using a wooden spatula. Alternative method: Dry on a radiator or other warm, dry surface for 1-3 days. Once completely dry, store in an airtight container.
Frozen Pasta
Storage time: 6 months
Form pasta into small nests and arrange on a baking sheet with space between each portion. Air dry for 20-30 minutes before transferring to freezer. Once fully frozen, pack into portion-sized airtight containers or ziplock bags.
Cooking Tips for Frozen Pasta:
- Cook directly from freezer - do not thaw
- Use extra boiling water when cooking large portions of frozen pasta
- Follow regular cooking instructions otherwise.
| Nutrition (per 100 g) | |
|---|---|
| 4.4 g | Fats |
| 33.24 g | Carbs |
| 10.8 g | Proteins |
| 216.48 ccal | Calories |
Leave a Comment